Permission
In the Permission module, the default administrator (hereinafter referred to as “the administrator”) can create, delete and modify users and user groups, and manage user access in standalone mode, or on the controller or data node in cluster mode.
The administrator can grant or deny access to users or user groups for the following scopes:
- Distributed Database
- Shared In-Memory Table
- Stream Table
- Function View
- Compute Group
- Global

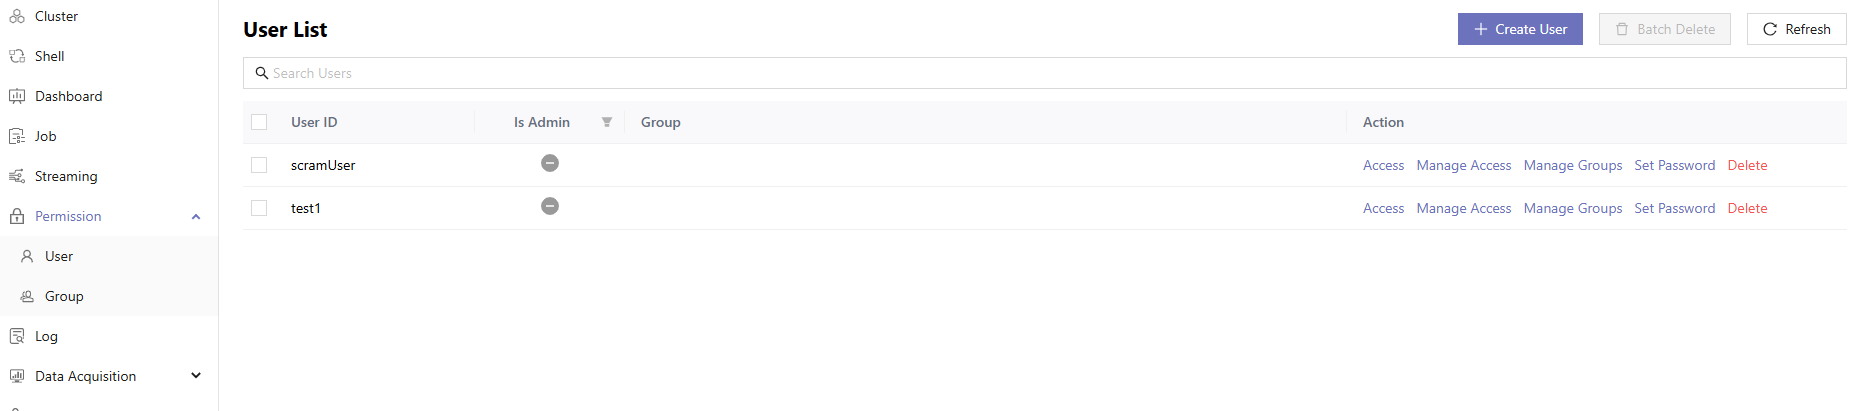
User
The administrator can configure user types (admin or non-admin), group, and specific access for a user.
Create a New User
- Click Permission > User.
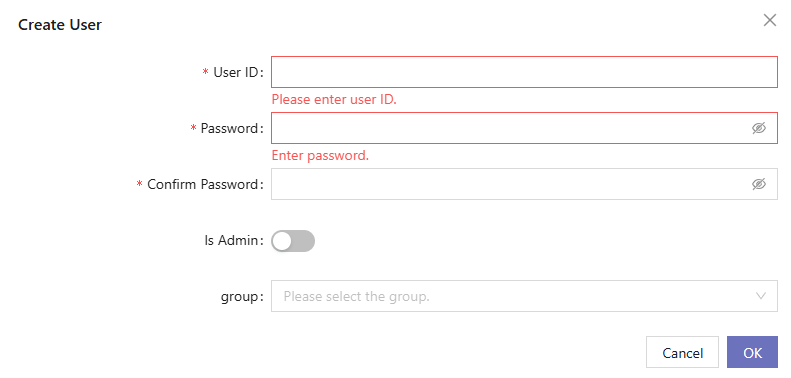
- Click Create User.
- Enter the user ID and password, and configure user type (admin or non-admin) and group. The password must be 6-20 characters consisting of numbers, uppercase and lowercase letters, and special characters. Spaces are not allowed.
- Click OK.
- You can see a pop-up notification with the message "Successfully Created" if successful.
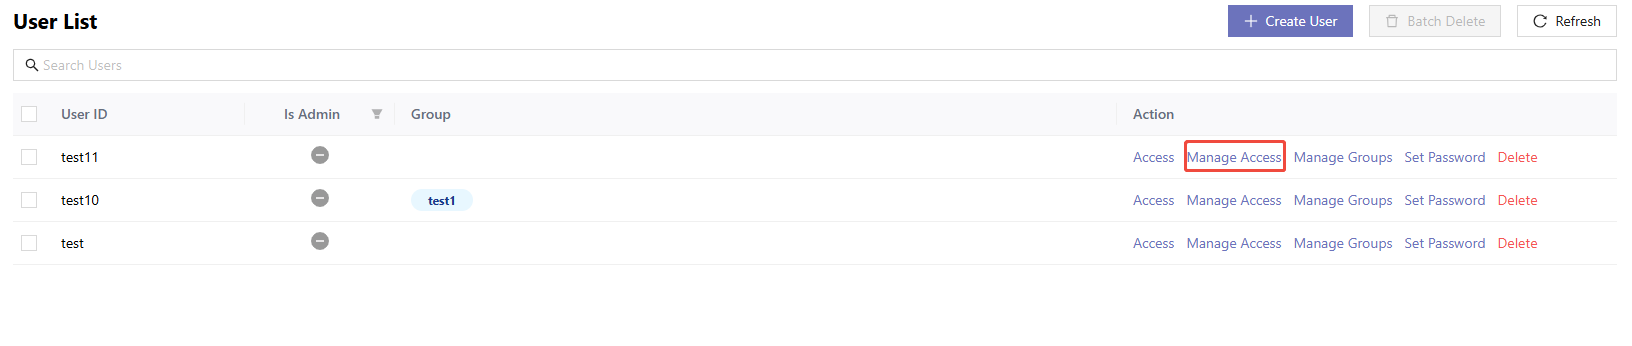
Manage Access
After creating a user, the administrator can grant or deny specific access. Take the Distributed Database as an example:
- Click Manage Access.
- Click Distributed Database.
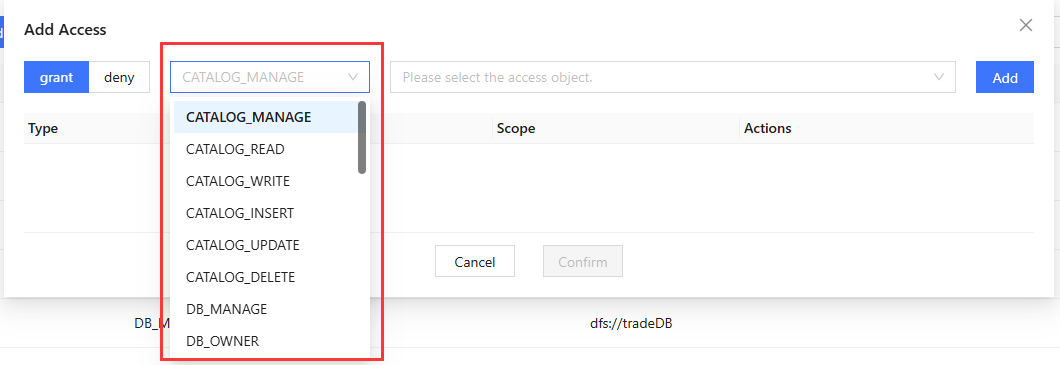
- Click Add Access.

- Click grant or deny.
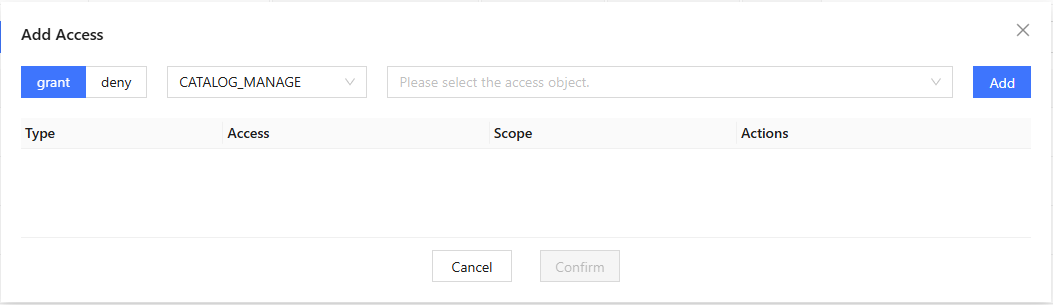
- Select the desired type from the dropdown list. The available types
vary depending on the current tab. Types for distributed database include:
Catalog-level: CATALOG_MANAGE, CATALOG_READ, CATALOG_WRITE, CATALOG_INSERT, CATALOG_UPDATE, CATALOG_DELETE.
Schema-level: SCHEMA_MANAGE, SCHEMAOBJ_CREATE, SCHEMAOBJ_DELETE, SCHEMA_READ, SCHEMA_WRITE/SCHEMA_INSERT/SCHEMA_UPDATE/SCHEMA_DELETE.
Database-level: DB_MANAGE, DBOBJ_CREATE, DBOBJ_DELETE, DB_OWNER, DB_WRITE, DB_INSERT, DB_UPDATE, DB_DELETE, DB_READ.
Table-level: TABLE_WRITE, TABLE_READ, TABLE_INSERT, TABLE_UPDATE, TABLE_DELETE.
- Select or enter the access object. The available access object vary
depending on the current tab and the selected type.
For a distributed database, select:
- Catalog-level types: Shows all catalogs.
- Schema-level types: Shows all schemas within catalogs.
- Database-level types: Shows all distributed databases.
- Only for databases without a catalog and schemas within a catalog.
- Enter the dbUrl, not the name of the schema when granting access to a schema within a catalog.
- Table-level types: Shows all DFS tables.
- For tables within a catalog: Shown in tree structure: Catalog → Schema → table.
- For tables without a catalog: Shown in the default group named “DATABASES_WITHOUT_CATALOG”.
- If you select DB_OWNER, you need to type the access object manually.
- Click Add to preview.
- Preview the changes and remove the access to be added if needed.
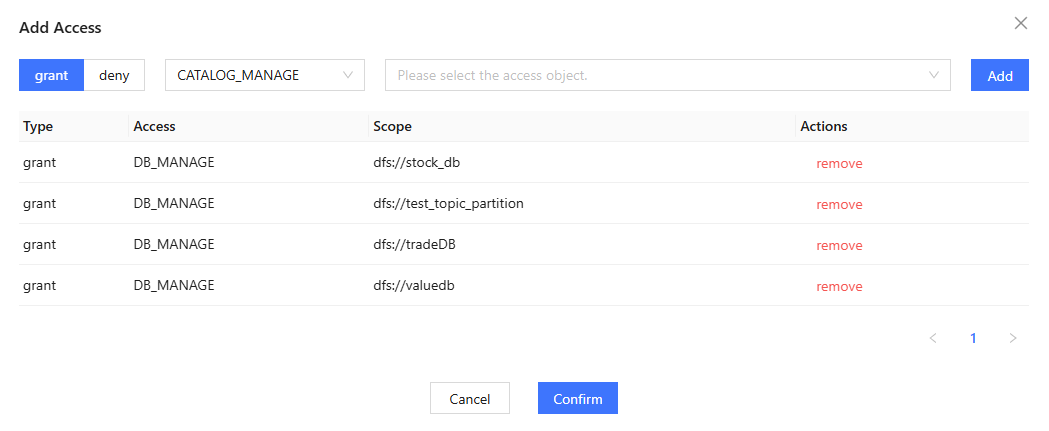
- Click Confirm. You can see a pop-up notification with the message "Permission granted successfully" if successful.
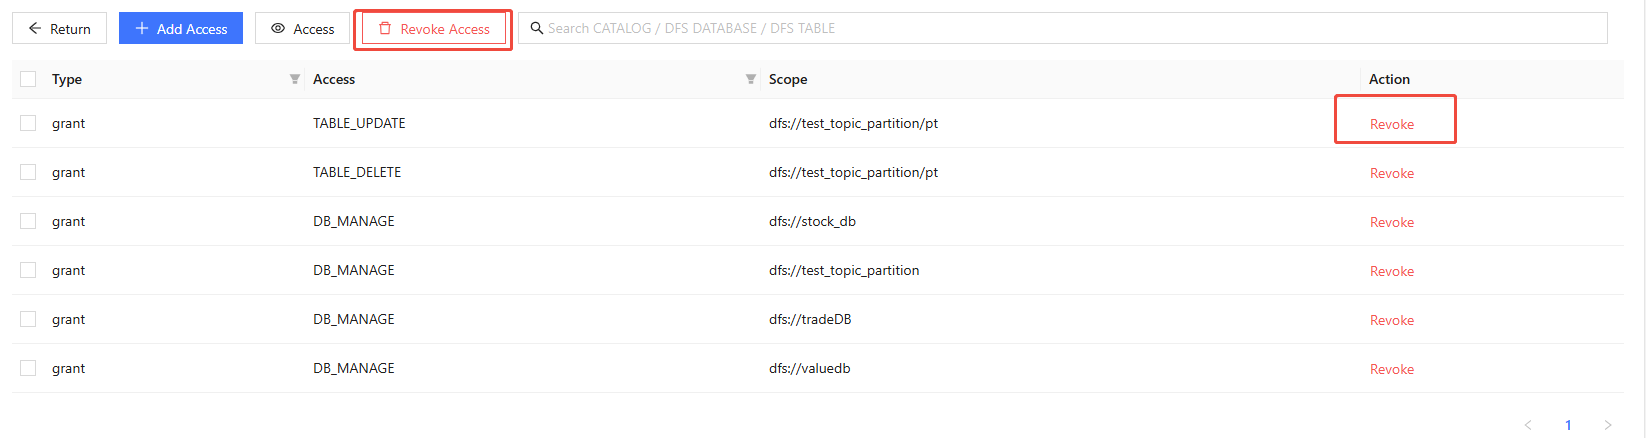
Click Revoke or Revoke Access to revoke access. You can see a pop-up notification with the message "Revoked successfully" if successful.
Operations on Shared In-Memory Table, Stream Table, Compute Group, Function View and Global are similar.
View Access
Click Access.

Users can also view access to each database in Shell.
- Hover over the database in Database Explorer.
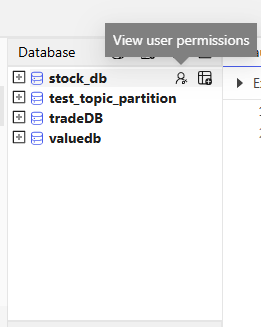
- Click the buttonto view user access.
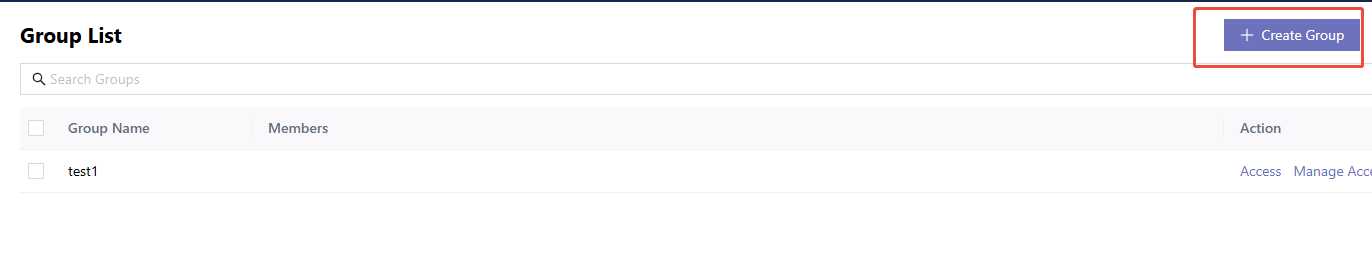
Group
When dealing with a large number of users, access management on user-level may require cumbersome operations. In such situations, the administrator can perform group management to enable efficient batch operations.
Create a Group
- Click Create Group.
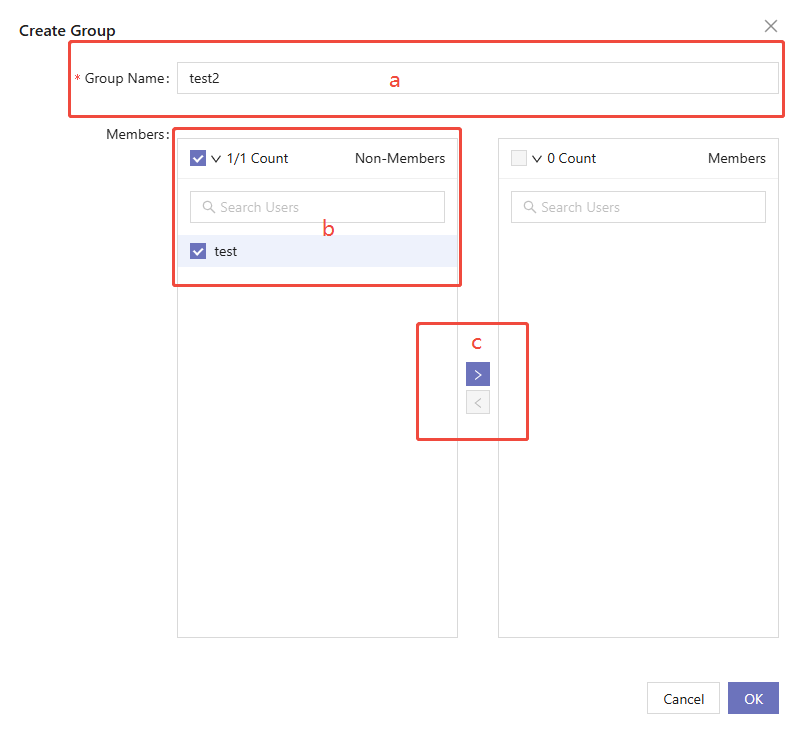
Configure the group:
- Enter the group name.
- Select members to be added in the left panel.
- Click the first arrow to add members.
- Click OK. You can see a pop-up notification with the message "Successfully Created" if successful.
Delete a Group
To delete a single group:
- Click Delete.
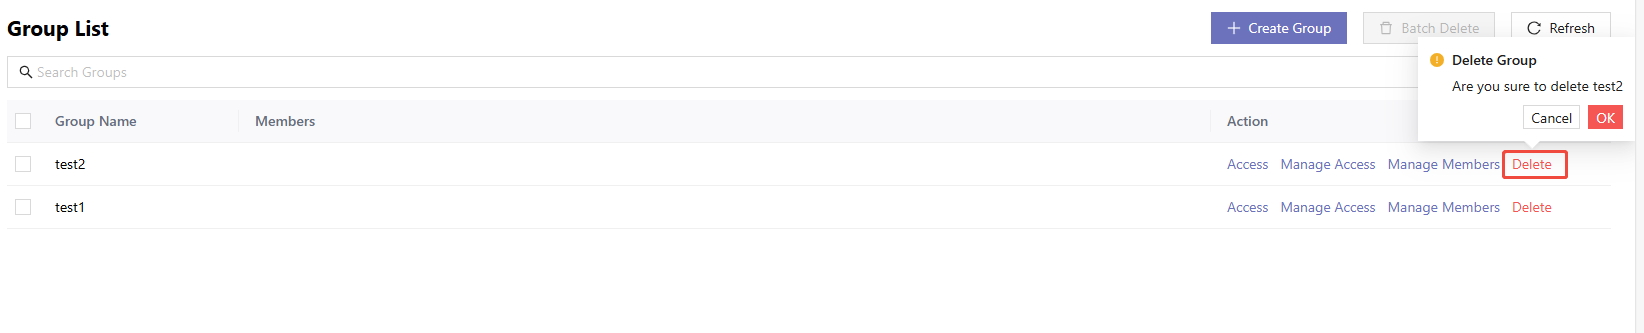
- Click OK. You can see a pop-up notification with the message "Successfully Deleted" if successful.
To delete groups in batches:
- Select the groups. Click Batch Delete.
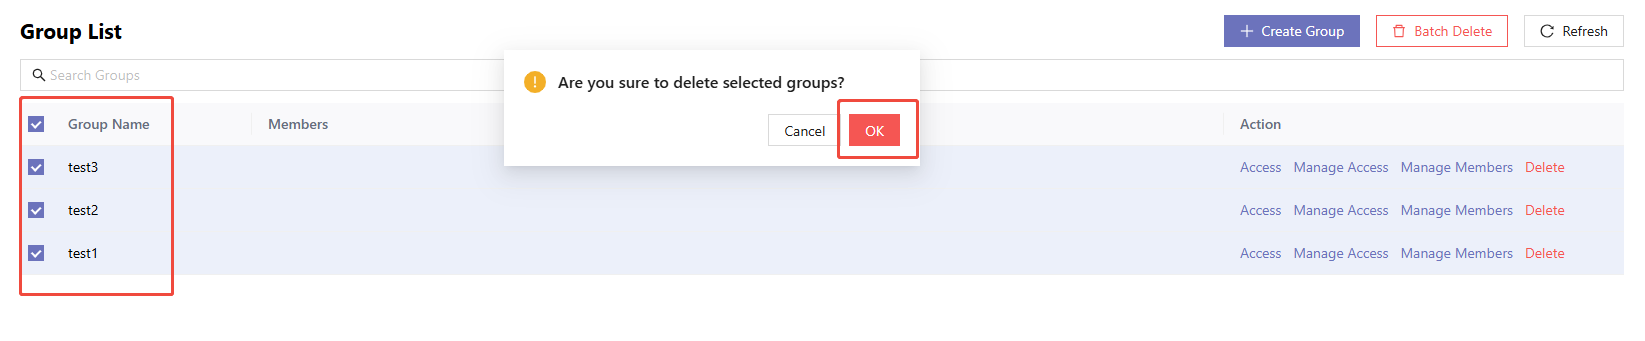
- Click OK. You can see a pop-up notification with the message "Successfully Deleted" if successful.
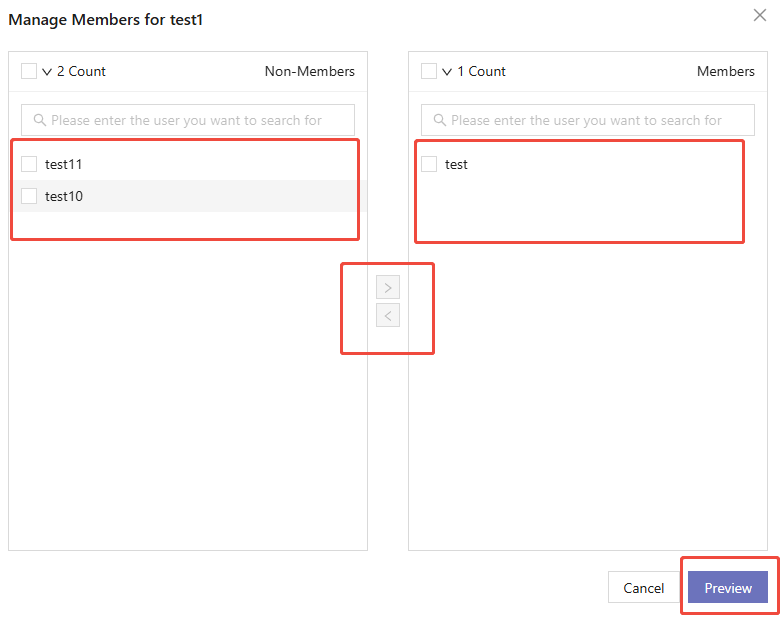
Manage Group Members
- Click Manage Members.

- The left panel shows external users. The right panel shows members of the
group. Select members to be added or removed and click the corresponding
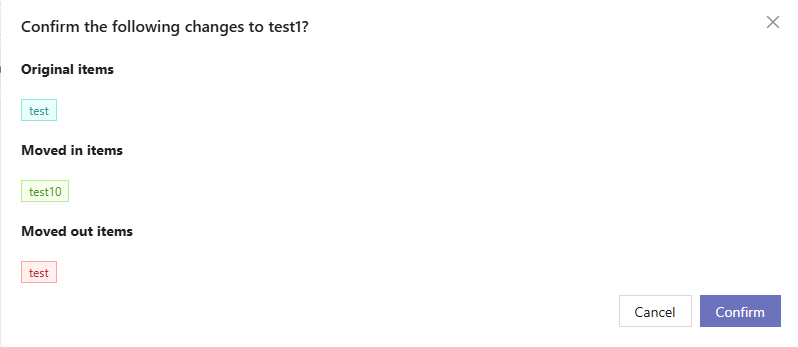
arrow. Click Preview to preview the changes.
- Click OK. You can see a pop-up notification with the message
"Successfully Changed" if successful.
Operations of viewing access and managing access are the same as the access management on user-level. See User Access Control for more details about user access.