Plugins
Through the plugin management interface, administrators can centrally manage plugins across all nodes in the cluster. This includes viewing plugin versions, one-click installation and loading of plugins to ensure consistency between the version of DolphinDB server and plugin versions deployed on each node. This helps avoid issues caused by version mismatches between nodes.
Viewing Plugin Information
By logging into the web client as an administrator from any node in the cluster, users can access the plugin management interface via the sidebar.
Cluster Overview
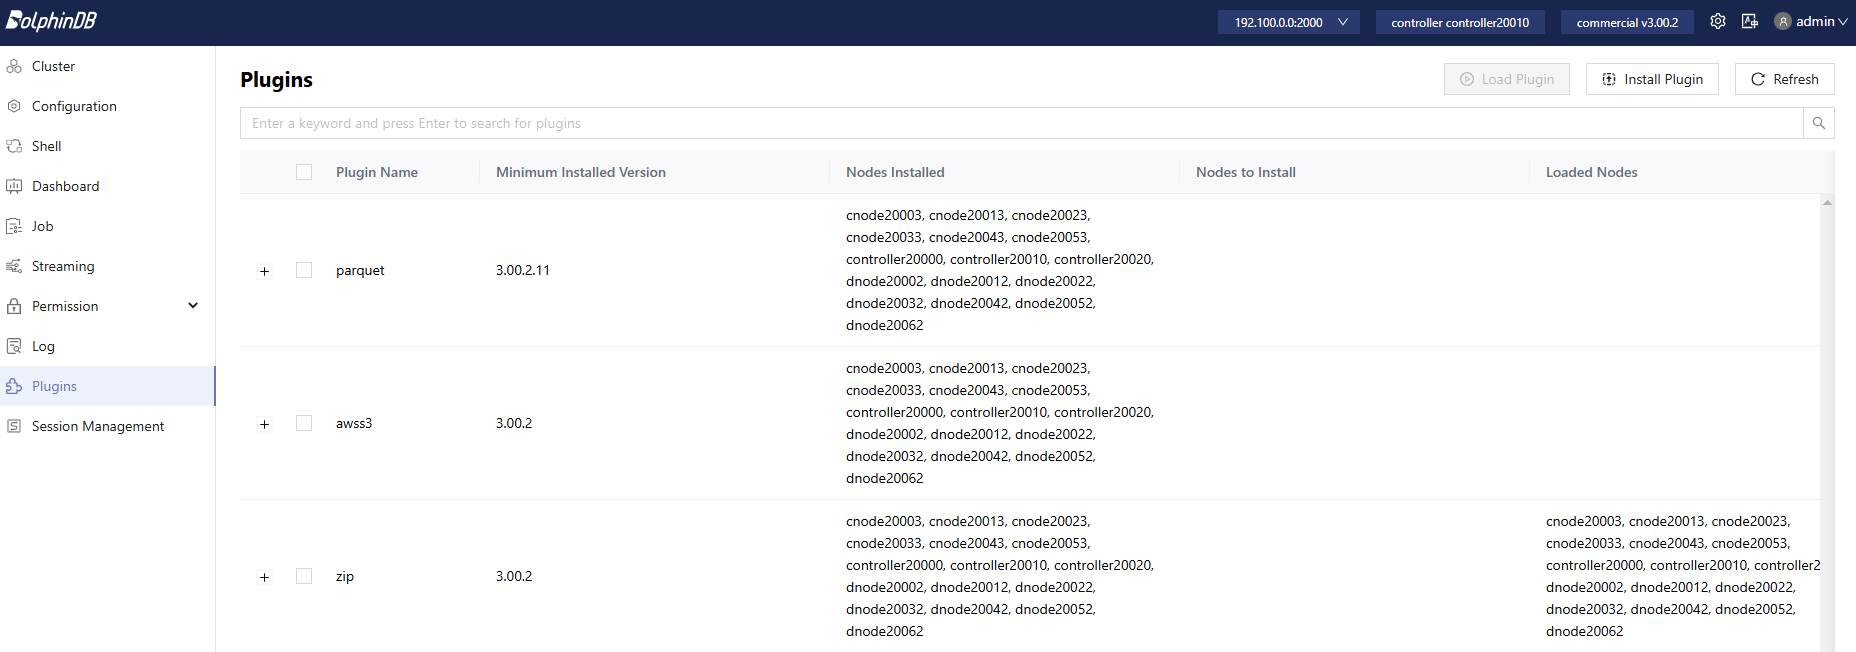
The main page displays a list of all plugins installed across the cluster. For each plugin, it shows the minimum version used, the nodes where it is installed, and the nodes where it is currently loaded. A search bar at the top allows users to quickly locate specific plugins.
Node Details
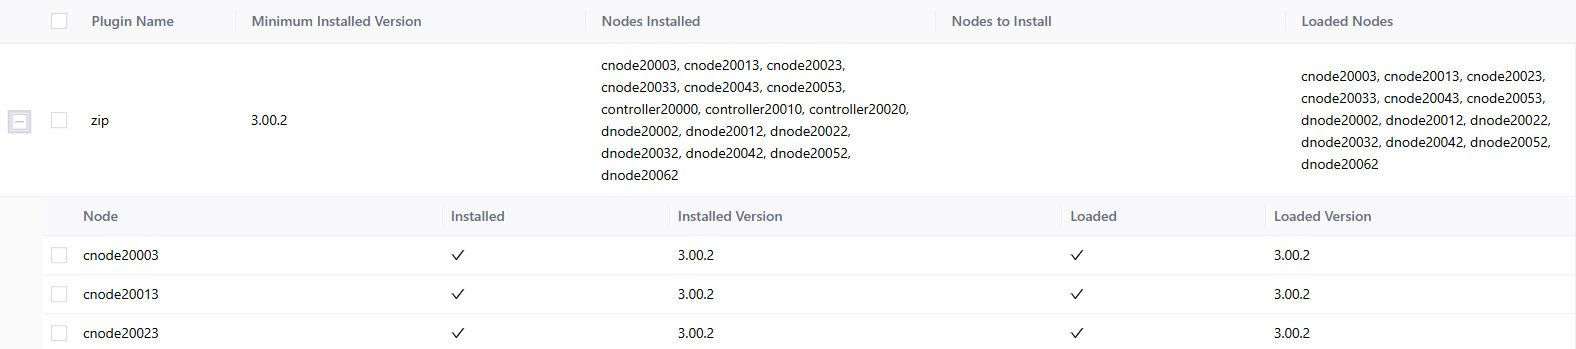
Click the + button before a plugin to view its installation and loading status across individual nodes.
Loading Installed Plugins
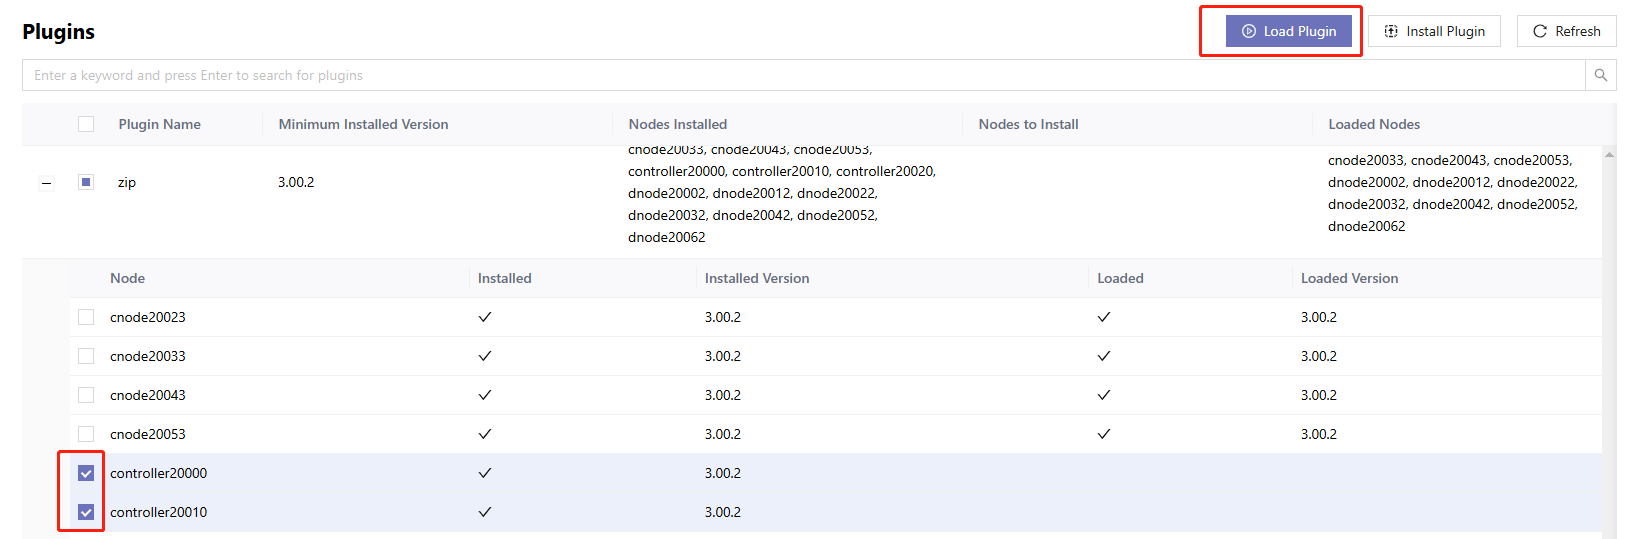
To load a plugin on all nodes that have installed it, select the target plugin and click Load Plugin in the top-right corner.
To load the plugin on specific nodes in the cluster, expand the menu under the target plugin, select the nodes, and click Load Plugin.
Installing or Updating Plugins
Plugin management provides three methods for installing/updating plugins. Users can choose the one that best suits their needs.
Click the Install Plugin button at the top right corner of the page to open the pop-up window.

Offline Installation
This method is suitable for offline environments where online installation is not
possible or for installing custom-developed plugins. For plugin development, refer
to the official documentation. Ensure that the plugin's ZIP
file name follows the naming format:
<PluginName>-<OperatingSystem>-<CPUArchitecture>-<ServerVersion>-<PluginVersion>-<CompileIdentifier(Optional)>.zip,
where
- PluginName: A combination of letters and numbers.
- OperatingSystem: Linux or Windows.
- CPU: X86, ARM32, or ARM64.
- Server Version: Three numbers separated by periods, for example,
3.00.2. - Plugin Version: Three to five numbers separated by periods, for example,
3.00.2or3.00.2.1.1. - Compile Identifier (optional): JIT or ABI.
For example, arrow-Linux-X86-3.00.2-3.00.2.zip.
In the pop-up window, select Offline Installation. After selecting the target node and uploading the ZIP file, click Install or Update.
Online Installation
Users can install the latest (or specified) version of DolphinDB official plugins directly through the plugin management interface. Make sure the machine hosting the node must have access to the DolphinDB Plugin Market, with the default being the domestic plugin market.
In the pop-up window, select Online Installation, choose the plugin to
install/update, the target node, the plugin version (defaulting to the latest
version compatible with the current DolphinDB server), and the plugin repository,
then click Install or Update. This method is equivalent to using the
built-in function installPlugin; for more details, refer to the
function documentation.
Synchronization from Other Nodes
If a plugin is installed on one node of the cluster, or if there are version mismatches between plugins installed on different nodes, you can use the sync feature to synchronize the plugin from the specified node to other nodes.
In the pop-up window, select Synchronize from a Node, choose the plugin to install/update, the target node, and the source node, then click Install or Update.